

Nobody writes home about a fan cleaning, yet after two or three years of service it is the single most effective performance procedure left for most gaming laptops. This laptop cooling thermal paste emulator guide walks the physical side of the heat problem in ascending order of effort: the airflow habits that cost nothing, the dust clean-out that costs an afternoon, and the thermal paste replacement that costs care, a screwdriver, and your warranty if the machine is still covered. Emulator sessions expose cooling decay brutally because they load the CPU continuously, so a laptop that “still runs fine” in bursty desktop work can be quietly throttling through every match you play. Work through the stages in order and stop at the one that fixes your machine.
Stage Zero: Prove It Is Heat, and Exhaust the Free Fixes
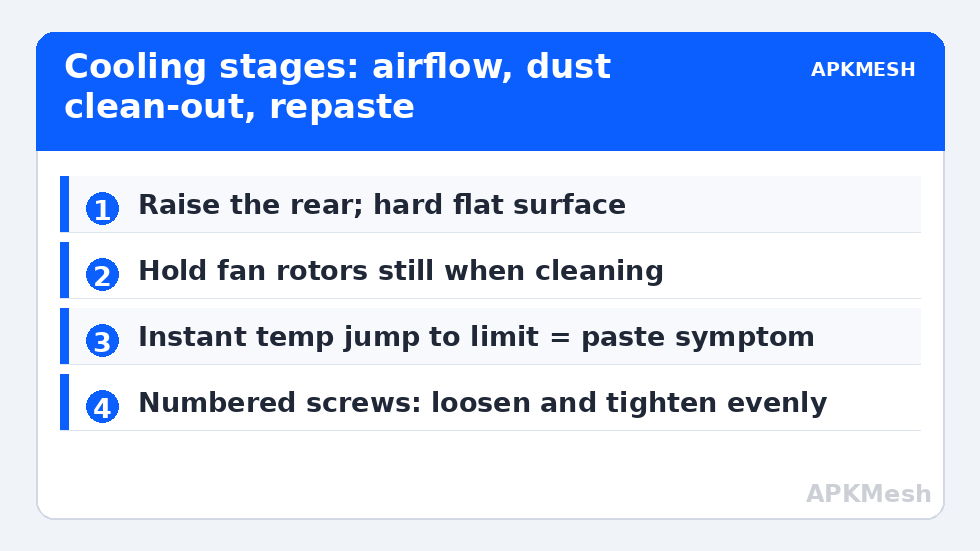
Before a single screw turns, confirm the diagnosis with temperature and clock logging as described in our thermal throttling guide and set up with the MSI Afterburner monitoring guide: temperatures pinned at the limit with clocks sagging over a fifteen-minute emulator session. Then clear the free wins, because a surprising share of “needs a repaste” laptops actually need a desk change. Run the laptop on a hard flat surface, never on bedding; raise the rear edge a couple of centimetres with a stand or even a book under the back feet so the bottom intakes breathe; move it away from the wall it exhausts against; and use the manufacturer’s performance or turbo fan profile during play — the quiet profiles deliberately trade temperature headroom for acoustics, which is precisely backwards for sustained emulation. Note your logged temperatures after these changes; they are the baseline every later stage must beat.
Stage One: The Dust Clean-Out
Laptop heatsinks are fin stacks with gaps a fraction of a millimetre wide, and household dust mats across them like felt, forcing air around instead of through. Cleaning them properly means opening the machine, because blowing compressed air into the vents from outside mostly redistributes the mat deeper into the fins.
- Shut down fully, unplug, and remove the bottom panel (screws often hide under rubber feet; note differing lengths).
- Disconnect the battery connector first if it is accessible — working around a live board is how clips and connectors die.
- Hold each fan rotor still with a fingertip or plastic spudger (a fan spun freely by air becomes a little generator), then brush the fin stacks with a soft anti-static brush and blow short air bursts outward, the reverse of the normal airflow path.
- Clean the intake grilles and the fan blades themselves; caked blades move noticeably less air.
- Reassemble, reconnect the battery, and re-log the same emulator session for comparison.
A three-year-old laptop that has never been opened commonly sheds several degrees from this stage alone, and the fan noise at a given workload drops because the fans no longer fight a blocked exhaust. If your temperatures were only mildly elevated, stop here and set a calendar note to repeat yearly.
Lag risk: —
Stage Two: Thermal Paste — When, and When Absolutely Not
Thermal paste fills the microscopic gaps between the chip and the heatsink. Over years of heat cycles it can dry, crack, or pump out from between the surfaces, and at that point no amount of clean fin will restore the transfer across that interface. The signs that point at paste rather than dust: the machine was cleaned and barely improved; temperatures jump almost instantly to the limit when load starts (a transfer problem, not an airflow problem); or the laptop is four-plus years old and has always run hot. Now the cautions, stated plainly. Opening the heatsink assembly voids the warranty on many models — if the machine is under warranty, have the vendor’s service do it. Some laptops use liquid metal or phase-change pads from the factory; liquid metal is conductive, unforgiving, and not a beginner material, and a phase-change pad in good condition should simply be left alone. If any of that sounds like your machine, treat repasting as a job for a repair shop.
| Material | Suitability for a first repaste | Notes |
|---|---|---|
| Standard ceramic/silicone paste | Good | Safe, non-conductive, easy to clean up |
| High-performance carbon paste | Good | Slightly better transfer; still non-conductive types exist — verify |
| Phase-change pad (PTM-type) | Excellent on laptops | Forgiving application, durable; popular for thin machines |
| Liquid metal | Not for beginners | Electrically conductive; a spill can kill the board |
Stage Two, Continued: The Repaste Procedure in Brief
With the machine open and the battery disconnected, photograph the heatsink layout before touching it. Remove the heatsink screws in the reverse of their numbered order (they are usually numbered for even pressure) a half-turn at a time, lift the assembly straight off, and inspect the old paste: dry, cracked, or squeezed out to the edges all confirm the diagnosis. Clean both the chip dies and the heatsink faces with isopropyl alcohol (90 percent or higher) and lint-free wipes until no residue remains — mirror dies on the CPU and GPU must be spotless and untouched by fingers afterwards. Apply a thin, even layer of new paste to each die (for phase-change pads, cut to size and lay in place), then refit the heatsink tightening screws in numbered order, again a little at a time, to the snugness they had — overtightening risks the board, undertightening ruins contact. Also inspect the thermal pads on the VRAM and VRM components while you are here: torn or crumbling pads should be replaced with pads of the same thickness, never with paste. Reconnect the battery, close up, and re-run your logged test session. A successful repaste on a genuinely dried-out machine shows temperatures falling by a clearly visible margin and, more importantly, clocks holding where they used to sag. If your machine also permits it, undervolting stacks beautifully with a repaste — see our undervolting guide — and the APKMesh homepage collects the rest of the cooling sequence.
Frequently Asked Questions
How often should a gaming laptop be repasted?
Only on evidence, not on a schedule. Quality paste in a healthy machine lasts years; repaste when temperature behaviour changes in the ways this guide describes — instant jumps to the limit, no improvement from cleaning — rather than at an arbitrary anniversary. Unnecessary repastes carry more risk (screws, connectors, warranty) than the ageing paste they replace.
Will cleaning and repasting void my warranty?
Removing the bottom panel for dust cleaning is treated as user maintenance by many brands and as warranty-voiding by others; heatsink removal is more often restricted. Read your warranty terms or ask the vendor first. If the machine is covered and running hot, a warranty service visit for the thermal problem itself is the right channel — overheating under normal use is a defect, not a hobby project.
Is a cooling pad worth buying instead of opening the laptop?
A pad helps a little on designs that intake from the bottom, and much of that benefit is simply the elevation, which a plain stand provides free. Pads cannot compensate for matted fins or dried paste because the bottleneck is inside the machine. Buy the pad for ergonomics if you like; do the cleaning for thermals.
My temperatures dropped but fan noise did not. Is that normal?
Yes, at first. Fan curves respond to temperature, so the same session should eventually run quieter — but if the vendor profile pins fans high regardless, noise stays. Judge the job on temperatures and sustained clocks, then choose a balanced fan profile if acoustics matter. Persistently frantic fans at idle suggest a background load problem, not a cooling one.
Can I use toothpaste or another household substitute in an emergency?
No. Improvised substitutes dry out within hours to days, transfer heat poorly, and can corrode or stain the surfaces, turning a routine repaste into a repair. If you lack proper paste, reassemble with the old paste undisturbed and order the real material — a delayed job beats a damaged one.