
The BlueStacks 5 Pie 64-bit instance is the one most games now expect — many titles dropped 32-bit builds entirely — yet it is also the instance low-end owners fear, because 64-bit Android carries a slightly larger memory footprint. The fear is mostly misplaced. With deliberate bluestacks 5 pie 64 bit low end pc tuning, a dual-core-era machine with 4–8GB RAM and integrated graphics runs the Pie 64 instance acceptably for the majority of popular games, provided you resist BlueStacks’ own “high performance” presets, which are calibrated for gaming desktops, not for your hardware.
Create the Right Instance First
Open the Multi-Instance Manager (Ctrl+Shift+8) and create a fresh Pie 64-bit instance rather than cloning an old Nougat one. Cloned instances inherit legacy settings and leftover data. During creation choose:
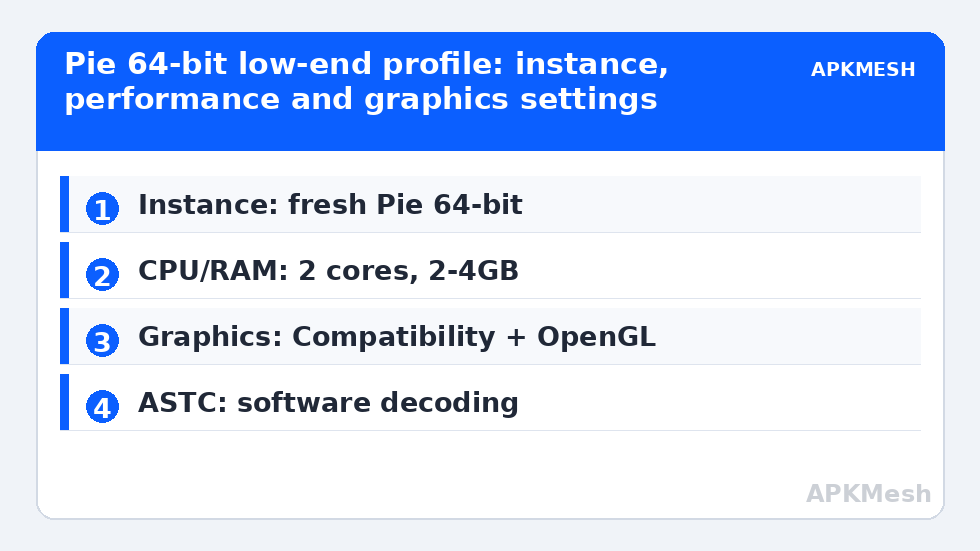
- CPU cores: 2 (4 only if your CPU has 8 threads)
- Memory allocation: 2GB on a 4GB PC, 3–4GB on an 8GB PC
- Resolution: 1280×720 landscape, 240 DPI
- ABI settings: leave on Auto; Pie 64 handles ARM translation itself
- FPS: cap at 60; disable “Enable high frame rate” for now
If the instance list already has a Pie 64 instance you barely use, deleting its data (Settings > Apps, or a fresh instance) often fixes months of accumulated cache bloat in one step.
BlueStacks 5 Pie 64 Bit Low End PC: Performance Settings That Move the Needle
Inside the running instance, open Settings (gear icon) and go to Performance. BlueStacks offers Low / Medium / High presets; ignore them and set values manually. The preset logic over-allocates on weak machines. Then open the Graphics tab:
| Graphics option | Low-end choice | Notes |
|---|---|---|
| Graphics engine mode | Compatibility | Performance mode is faster on strong GPUs but glitch-prone on old iGPUs |
| Graphics renderer | OpenGL | Switch to DirectX only for specific broken games |
| Interface renderer | Auto | Change only if the BlueStacks UI itself flickers |
| GPU in use | Dedicated/integrated default | On laptops, prefer the iGPU for thermals unless a game demands more |
| ASTC textures (Beta) | Software decoding | Hardware ASTC paths stutter on pre-2019 Intel graphics |
| Prefer dedicated computer graphics | Off on iGPU-only PCs | Irrelevant without a discrete card; avoids a needless warning |
Under Display, confirm 1280×720 and 240 DPI. Under Engine/Device profile, keep the default device profile — spoofing a flagship phone profile can unlock in-game graphics options your hardware cannot service, which hurts more than it helps.
Lag risk: —
The Windows Layer Underneath BlueStacks
BlueStacks performance on a low-end PC is decided as much by Windows as by the emulator. Virtualization (VT-x/AMD-V) must be enabled in BIOS — BlueStacks will run without it on some builds, but at a fraction of the speed; the app player’s own home screen shows a warning when VT is off, and fixing that single item is the largest speed-up available to any user. Hyper-V, Windows Hypervisor Platform, Memory Integrity (Core Isolation) and Virtual Machine Platform all contend with BlueStacks’ hypervisor on Windows 11; BlueStacks publishes a build that coexists with Hyper-V, but on genuinely low-end hardware the classic build with those features off is still the smoother option. Decide consciously rather than stacking every Windows virtualization feature at once.
Our renderer deep-dive, OpenGL vs DirectX vs Vulkan settings explained, covers when each graphics path wins. For the maths behind the allocations above, read how to allocate CPU and RAM in emulators, and for refresh-rate capable displays see enabling 90Hz/120Hz in BlueStacks and LDPlayer. More guides sit in the Emulator Settings section.
Eco Mode and Multi-Instance Discipline
BlueStacks’ Eco Mode (battery icon, bottom right) throttles an instance’s FPS and resource draw. On a low-end PC, Eco Mode is not just for farmers running many instances — enabling a mild Eco profile on your single instance while you are in menus or queues stops the emulator from rendering 60 frames of a static lobby. Just remember to turn it off before a match; forgetting is the most common cause of “my game suddenly runs at 15 FPS” reports.
A Realistic Expectations Table
| Hardware tier | Typical outcome on Pie 64 | Best-fit settings |
|---|---|---|
| 4GB RAM, 2-core/4-thread, Intel HD 520/620 | Playable 40–60 FPS in light/mid games at 720p | 2 cores, 2GB RAM, Compatibility + OpenGL |
| 8GB RAM, 4-core/8-thread, UHD 630 / Vega 8 | Stable 60 FPS in most popular titles at 720–900p | 4 cores, 4GB RAM, Performance mode optional |
| 8GB RAM, old discrete GPU (GT 1030 class) | 60 FPS at 1080p in mid games | 4 cores, 4GB RAM, DirectX or OpenGL per game |
| Anything with VT disabled | Severe slowdowns regardless of settings | Fix VT in BIOS before touching anything else |
Troubleshooting the Usual Pie 64 Complaints
“Engine won’t start.” Usually a hypervisor conflict or a corrupted instance. Try the Hyper-V-compatible BlueStacks build, or disable Memory Integrity and reboot. “Game says device incompatible.” The Pie 64 instance with a current device profile fixes most of these; clearing Play Store data inside the instance helps the rest. “It got slower over weeks.” Android caches and game data grow; wiping an unused game’s data or recreating the instance annually is normal maintenance, not a failure. Back up first — our guide to backing up and restoring emulator game data covers the safe order of operations.
Two BlueStacks Features Low-End Users Should Configure Deliberately
Trim Memory
BlueStacks includes a “Trim Memory” utility (in the sidebar utilities) that releases cached RAM from the instance back to Windows. On an 8GB PC that accumulates browser tabs and emulator cache across a long day, running it before a session reclaims several hundred MB that would otherwise become pagefile pressure mid-game. It is not a performance feature in the render sense — it is a headroom feature, and headroom is the entire game on low-end hardware. Use it when Task Manager shows total memory above 80% before you even launch.
Instance Manager Hygiene
Every additional instance you create reserves disk and tempts background processes. Low-end owners should keep exactly two instances: the Pie 64 main and one spare for experiments or a second account. Delete the sample instances BlueStacks may have created during first-run tours. When an instance becomes corrupt or bloated beyond patience, exporting your game’s account progress and recreating the instance fresh is faster and more reliable than weeks of cache-clearing rituals — which is why the backup-first habit matters before you ever need it.
Finally, set BlueStacks’ update behavior consciously: engine updates arrive frequently and occasionally change performance characteristics on old GPUs. If your setup is finally stable, note your BlueStacks version somewhere; if an update regresses a favorite game, you will know exactly which variable moved.
A Note on Disk Space and Instance Bloat
Pie 64 instances grow: a fresh instance near 5GB becomes 15–25GB after a few game installs and months of cache. On a low-end PC with a small SSD, that growth eventually triggers the storage-full slowdowns users blame on RAM. Audit quarterly: uninstall games you no longer open (their data is the bulk), clear the cache of the heaviest apps, and if an instance still feels swollen, recreate it fresh after securing account-linked progress — a clean Pie 64 instance restoring from game accounts takes under an hour and regularly feels like a hardware upgrade. Keep at least 15% of the system drive free at all times; below that threshold, both SSDs and Windows itself lose performance in ways that masquerade as emulator problems.
Frequently Asked Questions
Is Pie 64-bit faster than Nougat 32-bit on a low-end PC?
Not inherently — Nougat 32 uses slightly less RAM. But many current games only ship 64-bit builds, and Pie 64 receives BlueStacks’ newest engine fixes. On a PC with at least 4GB RAM, Pie 64 with tuned settings is the practical choice.
How much RAM should I give BlueStacks 5 Pie 64 with 8GB total?
3–4GB. Leaving Windows at least 3GB prevents paging during gameplay. Giving the instance 6GB on an 8GB machine consistently makes overall smoothness worse, not better.
Why does BlueStacks warn that virtualization is disabled?
VT-x or AMD-V is off in your BIOS/UEFI, or Windows features like Memory Integrity are intercepting it. Enable VT in BIOS first, then check Core Isolation settings in Windows Security if the warning persists.
Compatibility or Performance graphics mode on an old PC?
Compatibility mode with OpenGL. Performance mode assumes a stronger GPU pipeline; on older integrated graphics it tends to produce texture glitches and crashes that look like random game bugs.
Does Eco Mode help a single instance on a weak PC?
Yes, situationally. Eco Mode caps frame rate and resource use, which keeps menus and lobbies from heating the laptop. Disable it before active gameplay or the cap will limit your match FPS.